domenica 30 giugno 2013

KK Center Hk Review: nail foil and butterfly nail decoration

ITA
Buona seeeraaa ^^
Oggi ho una review di due prodotti inviatimi da KKCenterHk per voi!
Innanzitutto, ecco come si presenta il pacchetto (inviato il 31 maggio e arrivato il 18 giugno da Hong Kong):

ENG
Good niiight ^^
Today I have a review for you, thanks to KKCenterHk!
Here's how the packaging was like (and it had a very quick shipping, less than 20 days from Hong Kong to Italy):


Come vedete, era proprio ben impacchettato!
Ed ecco il primo prodotto (non fate caso al cotton fioc e al bastoncino per cuticole):

As you can see, it was pretty well packed!
Here's the first product (don't bother about the q-tip and the cuticle stick):


Un barattolino con un rotolino foil per unghie della N.Nail e la sua colla (il rotolo misura all'incirca 1.5m x 4cm)!
Ero estremamente curiosa di provare questo tipo di articolo che, per me, è una novità, non avendo mai provato nulla del genere! :)
Il modello della carta è il codice NNAIL-E29 che trovate QUI, dove trovate anche un video che spiega come utilizzare il foil!

Some nail foil transfer (150cm length, 5cm width) by N.Nail and its glue!
I was thrilled, I couldn't wait to try it out :D
The model is E29 and you can find it HERE, where you find a video tutorial too ^^


Per utilizzarlo, innanzitutto, va stesa l'apposita colla sopra una base di smalto (io ho utilizzato una mano di Excalibur) e bisogna aspettare fino a che questa da bianca non sia diventata trasparente.
Allora, dopo aver precedentemente preparato dei pezzetti pre-tagliati dal rotolino, bisogna armarsi di pazienza e applicare con cautela il foil sopra alla colla diventata trasparente (ma non ancora asciutta!) e spingere bene con, ad esempio un cotton fioc o un bastoncino per cuticole (ecco spiegato la presenza dei due nelle immagini!) e staccare, facendo attenzione che il foil abbia aderito alla colla.
Nell'immagine sopra, il primo pezzo a sinistra è messo a testa in giù per mostrarvi la differenza ^^
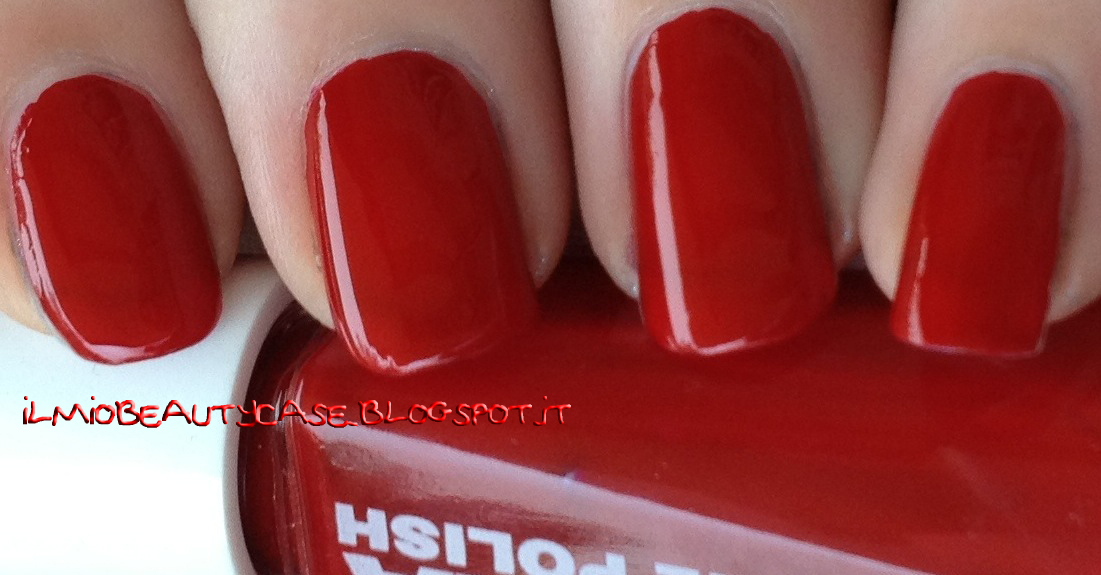
Ed ecco la mia prova:

You will need a coat of nail polish (I used one coat of Excalibur) and after it dried you will need to use a coat of glue. The glue is white but after some time it will be see-through and only then you have to put over it some nail foil transfer (remember to cut it first).
You will now need to gently press it on the nail e.g. with a q-tip or a cuticle stick and then you can remove the foil.
On the previous picture, the foil on the left is upside-down to show the "other face of the foil" haha.
Here's my first attempt:


Sì, in quasi tutte non mi è andata a buon fine al primo tentativo tranne che sul mignolo, sul quale mi è venuto perfetto!
Ecco quindi un doppio dettaglio del mignolo ahah:

Yes, I wasn't able to fit it perfectly on all of the nails except for the little finger nail, so here's a close-up of it just because it was simply perfect LOL:


Sì, io sto iniziando a prenderci mano solo ora ma devo ammettere che non è così difficile come sembra, anzi!
E mi piace proprio, il risultato! :)
Passando al secondo prodotto, ecco cosa vi mostro:

Well, I am practicing with the application and now it's not so hard as it looked once for me! :)
And I love the result! :)
Here's the second product:


Delle stupende farfalline (il righello, ovviamente, è in centimetri, giusto per darvi un'idea!) della Bluesea che trovate QUI, con il codice BLUESEA-FB02A.
Ogni confezione ha due farfalline all'interno.
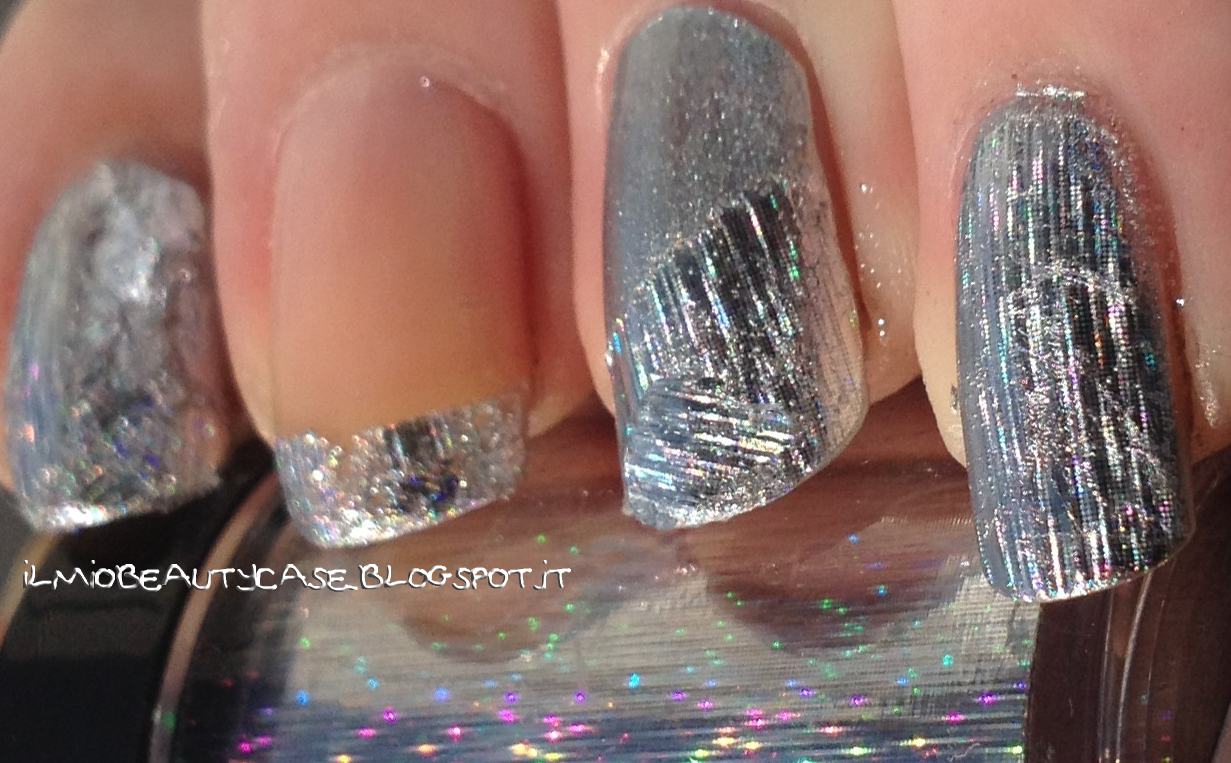
Io le ho provate sopra una gradient che, ahimé, ho fatto, senza accorgermene, con una spugnetta sporca! Aaarghhh XD

Some beautiful butterflies (the ruler is in cm) by Bluesea that you can find HERE, the item code is BLUESEA-FB02A.
Every pack has two butterflies.
I tried one of them over a gradient (sorry, I forgot the clean up and I used a dirty sponge T-T)!


Attenzione, la farfallina è DAVVERO in 3D, non è uno sticker, ecco due close-up per mostrarvi quanto effettivamente sporge dall'unghia:

Be aware, the butterfly has actually a 3D effect, it is not a sticker, here's a close-up:


Facendo molta attenzione, le farfalline possono essere staccate per poi essere riutilizzate (nel mio caso si è portata via un pezzo di smalto, per cui ho tentato di pulirla utilizzando una goccia di acetone e un cotton fioc).
Insomma, sono entrambi prodotti facili da utilizzare (anche se per il foil ci vuole un po' di pratica e pazienza) e veloci.
Vi ricordo che, sul sito KKCenterHk, che spedisce anche in Italia, potete trovare i foil qui (qui quello mostrato in questo post) e le decorazioni per nail art qui (qui quelle mostrate in questo post).
Infine, sappiate che KKCenterHk offre, oltre che prodotti per unghie (anche smalti), tanti articoli per make up, parrucche, vestiti e accessori e una vasta gamma di ciglia finta.
Beh, vi piacciono le decorazioni per unghie?
Cosa ne pensate dei foil (non come finish ma come effettivamente pellicole)?

If you will be pretty careful, you might detach the butterfly to re-use it (in my trial, it remove some nail polish but I made some clean up with a q-tip and a single drop of acetone and now it is almost perfect).
Well, this products are both pretty much easy (the foil needs a bit of practicing, tho) and very quick to use.
On the KKCenterHk site, it ships worldwide, you can find nail foil transfers here (here the one I just showed you) and nail art decorations here (here the ones I just showed you).
Last but not least, KKCenterHk has a nice amount of fake lashes, besides of make up items and cosmetics, wigs, clothing and accessorizes, besides of nail items (nail polishes too!).
So, do you like nail art decorations?
What do you think about nail foil transfers, have you ever tried them out?

Thank you for reading,
*Ky*

DISCLAIMER:
Questi articoli mi sono stati inviati da KKCenterHK.
Non ho ricevuto alcun compenso per questo post che riflette la mia opinione personale.

DISCLAIMER:
This products were sent to me by KKCenterHK.
I did not receive any compensation for this review that reflects my personal opinion.

sabato 29 giugno 2013

Layla 112

ITA
Aloha~
Post super rapido prima che mi diano per dispersa! :D

ENG
Aloha~
Just a very brief post before that my friends think me as a M.I.A.! :D


Layla 112, un (altro) rosso perfetto ^^
Nelle foto seguenti, al sole, si intravedono le lunette ma, fidatevi, a occhio nudo si nota poco o niente! ^^

Layla 112, another perfect red ^^
On the following pictures you can see the white edge of the nails but you won't see it or just a bit, IRL! ^^


Ed ecco due immagini all'ombra:

And here there are two photo in the shades:


Ok, prometto che questo sarà l'ultimo rosso creme da qui alla fine di luglio XD XD
E' che per me il rosso è così estiiivo :D
Ci leggiamo domani!
Baci baci

OK, this is the last creme red 'til the end of July XD XD
The thing is, the red on nails is summer, in my mind :D
Well, read you tomorrow!
xo, xo

Thank you for reading,
*Ky*

venerdì 28 giugno 2013

Holoton - Layla Hologram Effect 16 Coffee Love

ITA
Aloha~
Secondo appuntamento con la Holoton! :D
Qui sono le 2:30 del mattino, oggi purtroppo non avrò la possibilità di essere presente nel blog T_T
Infatti, ieri sera ho completato un cartellone per la laurea di una cara amica e le ho creato un video con moooolte foto con iMovie, ergo... S'è fatta 'na certa...
Poi la mia sveglia suonerà fra meno di 6 ore e dovrò andare, con un'amica, a fare le copie da appendere in giro, a cercare un regalo e a portare a casa la nuova compattina.
Verso la mezza avrò un pasto razzo e poi dovrò andare a lavorare con i "miei" ragazzi al centro estivo, per poi tornare a casa, struccarmi e ritruccarmi, cambiare smalto, cambiare i vestiti, andare all'aperitivo pre-festa, tornare a casa a cambiarmi e andare alla festa di laurea della suddetta amica.
Insomma, o pubblicavo ora o mai più XD

ENG
Aloha~
Second Holoton post! :D
Now, it's 2:30 a.m. and I won't be able to be online, today T_T
I had sooo many things to prepare for a friend's degree party for tomorrow evening and tomorrow morning I'll still have some things to prepare for that party.
On the afternoon I'll work so I had to post this post right now XD


Layla Hologram Effect 16 Coffee Love, un marrone cioccolatoso / caffettoso super holo che, stranamente, adoro!
Davvero, non avrei mai detto ma questo marrone mi piace proprio.
Ma devo anche dire che sulle mani sembra un quasi nero. LOVE!

Layla Hologram Effect 16 Coffee Love, a choco/coffe holo nail polish which, I have to admit, I love!
I wouldn't have thing anything like this but I really like this brown nail polish.
BUT it actually seems to be almost black, on the nails. LOVE!


E sotto le luci artificiali:

And under electric lights:


Ok, nanna-time! :D
Andate a trovare anche le colleghe qui sotto, io tornerò a farmi viva domani, nel pomeriggio, con un nuovo post e scusate tantissimo se in questi giorni sono impegnatissima :(
Bacini bacini

OK, bed-time for me! :D
Check below my buddies' posts' links! ^^
I will be back tomorrow in the afternoon, I am so sorry to be so busy on these days :(
xo, xo

Thank you for reading,
*Ky*


mercoledì 26 giugno 2013

Orly Monroe's Red

ITA
Buondì!
Finalmente mi sono imposta un buco in cui inserire ‘sto cavolo di Monroe’s Red, una delle tre colorazioni che erano in allegato a un qualche magazine lo scorso autunno ^^
Innanzitutto, parliamone.
Il nome immagino sia ispirato alla per-sempre-famosa Marilyn.
E per me, è già un problema.
Sì, perché, a me, ogni volta che leggo il nome di questo smalto, viene in mente lui:

ENG
Hello!
Finally, I find out a post to put this polish in! I own it since last Autumn, when I found it attached in a magazine.
First of all, its name: Monroe’s Red.
This is some kind of an issue, for me.
You know, I believe it’s named after the forever star Marilyn.
BUT, I don’t think to her.
My mind runs to him:


E chi ha da intendere, intenda (no, no, non aggiungo “gli altri, in camper”, tranquilli!).
D’altronde, rosso calza a pennello anche in questo caso, no (se non comprendete, fate finta di nulla!)?
Ma passiamo allo smalto:

And if you do not understand, no big deal.
Just pretend not to have read nor seen these words.
Here’s the lacquer:


Rosso.
Puro. Semplice. Classico.
Un colore perfetto per l’estate (ogni estate mi viene voglia di utilizzarlo almeno un paio di settimane!).
Vabbé, poretto, ha aspettato fin troppo il suo grande giorno, passiamo alle foto:

Red.
Pure, classical red.
Some kind of perfection for Summer (I ALWAYS wear it at least for a couple of weeks in Summer!).
And here come the pictures:


E un’ultima immagine all’ombra:

One last in-the-shade picture:


Insomma… rosso è rosso… che altro dire? ^u^”
Baci baci

Well… it’s red… isn’t it? ^u^”
xo xo

Thank you for reading,
*Ky*

lunedì 24 giugno 2013

Layla Graffiti Top Coat Rosso / Red Crackle Topper

ITA
Buona seraaa ^^
Ok, sono stanca morta, ho iniziato a lavoricchiare come animatrice e, ahimè, non sono proprio abituata, non c'ho più il fisico ahahah
Ragion per cui vi beccate un post super breve XD

ENG
Good evening ^^
Well, I'm pretty much tired, I've just started working in a Summer Camp as a entertainer officer and I'm K.O. LOL
So, here's a pretty brief post about today's nail polish or, better, topper XD


Layla Graffiti Top Coat Rosso! :D
Ok, ammetto, l'effetto graffiti/crackle/crackele etc etc non è, come i magnetici, il mio effetto preferito però è... diverso!
E, ogni tanto, mi piace anche utilizzarlo ^^

Layla Graffiti Top Coat in Red! :D
Well, I have to admit that this kind of effect (and the magnetic one) is not my favourite effect but... it is strikey!
And, sometimes, I love to use it ^^


Nelle foto sopra, da sinistra verso destra, lo vedete sopra:
• base bianca;
• base nera;
• base trasparente;
• base argento, il Layla 210.

On the photos above you see it over:
• white base;
• black base;
• clear base;
• silver base, Layla 210.


In queste, invece, lo trovate sopra:
• base gialla foil, B BasicBeauty NR. 39PE;
• base arancione, O•P•I He's My Boo;
• base rossa jelly, essence Snow White;
• base rosa, Pupa 300 Barbie Pink.

Here, it's over:
• yellow foil base, B BasicBeauty NR. 39PE;
• orange base, O•P•I He's My Boo;
• red jelly base, essence Snow White;
• pink base, Pupa 300 Barbie Pink.


E, infine, ho voluto provarlo sopra:
• base verde neon, Layla I♥Layla 06 Dark Green Fluo;
• base azzurro puffo, Essie 251 Avenue Maintain;
• base blu, Zoya Tart;
• base viola, Layla Ceramic Effect CE64.
Chiaramente, come potete vedere anche voi, non è il massimo, sopra colori molto scuri come il blu e il nero ma, almeno, spero di avervi reso un'idea ottimale del risultato!
E ora, tempo di relaxxx!
Bacini bacini

And finally I've tried it over:
• green neon base, Layla I♥Layla 06 Dark Green Fluo;
• smurf blue base, Essie 251 Avenue Maintain;
• blue base, Zoya Tart;
• purple base, Layla Ceramic Effect CE64.
Clearly, as you can see, it doesn't do its best over darker shades such as blue or black but, at least, I hope my pictures gave you the idea of the result!
And now, relax time for me!
xo xo

Thank you for reading,
*Ky*

venerdì 21 giugno 2013

Holoton - Color Club Worth The Risque (850)

ITA
Buondì :D
Rieccoci qua in una nuova serie di post gemelli ^^
Forse saprete che, dopo la serie di The Rainbow Ladies, è stato dato vita alla serie Duochrome, alla quale non ho partecipato per mera mancanza di materia prima (avevo pochissimi duochrome da postare, all'epoca... per cui, al posto di fare tre post e basta ho saltato, con molto dispiacere, il tutto).
Ma rieccoci quiiiii :D E... "we're here to stay!", per lo meno per 14 appuntamenti olografici, ogni venerdì ^^
La mia scelta di oggi?

ENG
Good morning :D
Here we are with a new twinsie posts series ^^
You might know that after The Rainbow Ladies' twinsie posts there was a Duochrome twinsie posts series. 
I didn't take part to the Duochrome thing because I didn't have much duochromes for that (I had 3 at that time and sadly I decided not to join the lovely ladies).
But... here we are :D 
And... "we're here to stay!", at least for 14 holo posts, every Friday ^^
My pick for the first post?


Color Club Worth The Risque (850), appartenente alla collezione primaverile del 2009, Femme Fatale.
Fino all'ultimo, avevo inserito uno smalto diverso ma mooolto simile per quest'oggi, ma, quando mi sono trovata davanti un cestone con smalti a 3€ fra cui questo, ho deciso di portarmelo all'istante a casa (e vi dico che con le non-luci del negozio, pensavo fosse un foil, non avevo nemmeno guardato il nome!), assieme ad alcuni suoi fratelli (11) ahah.
Sorpresona, una volta sotto le luci: holo powah XD

Color Club Worth The Risque (850), from the 2009 spring collection Femme Fatale.
I was going to post another nail polish but last Monday I found in front of me a bucket full of 3€ nail polishes and I found some (12) Color Clubs (they are not sold in Italy any more).
And I brought them home!
At first sight I didn't realize this was a holo, in the darkness of that shop but when I got it home...
Holo powah XD


All'ombra:

In the shades:


E sotto le luci artificiali:

And under electric lights:


Che dire? Adoro adoro ADORO! :D
Ok, non ha il maggior potere olografico del reame ma è stupendo, quasi etereo.
Lo vedrete "presto" in una comparazione con altri olografici argentati che ho, aspettavo di pubblicare l'ultimo per fare una comparazione dove sono tutti insieme ^^
Oh, non dimenticate di visitare le colleghe, qui sotto, eh! :D

What else can I say? Love it love it LOVE IT! :D
Well, it is not the greatest power effect of the world but it is amazing, it seems to be ethereal.
You will see it in a comparison "soon", when I will post my last silver holo nail polish with a comparison ^^
Don't forget to check my buddies' posts out (you can find their links below) :D

Thank you for reading,
*Ky*


Related Posts Plugin for WordPress, Blogger...